Spitfire HF Mk. VIII
- plasticalchemist
- Oct 21, 2019
- 2 min read
Hi all, today I will bring you my construction of the Eduard Spitfire HF Mk. VIII at 1/72.

On opening the box, I was very pleased with the contents, the plastic is the typical dark grey from Eduard. The clear parts come in a separated bag and isolated from the renaming sprues. Also, as this #Spitfire is a profipack edition, it comes loaded with PE. This has added a lot of detail to the cockpit making it look very impressive. The only annoying part is that after closing the fuselage it barely can be seen.
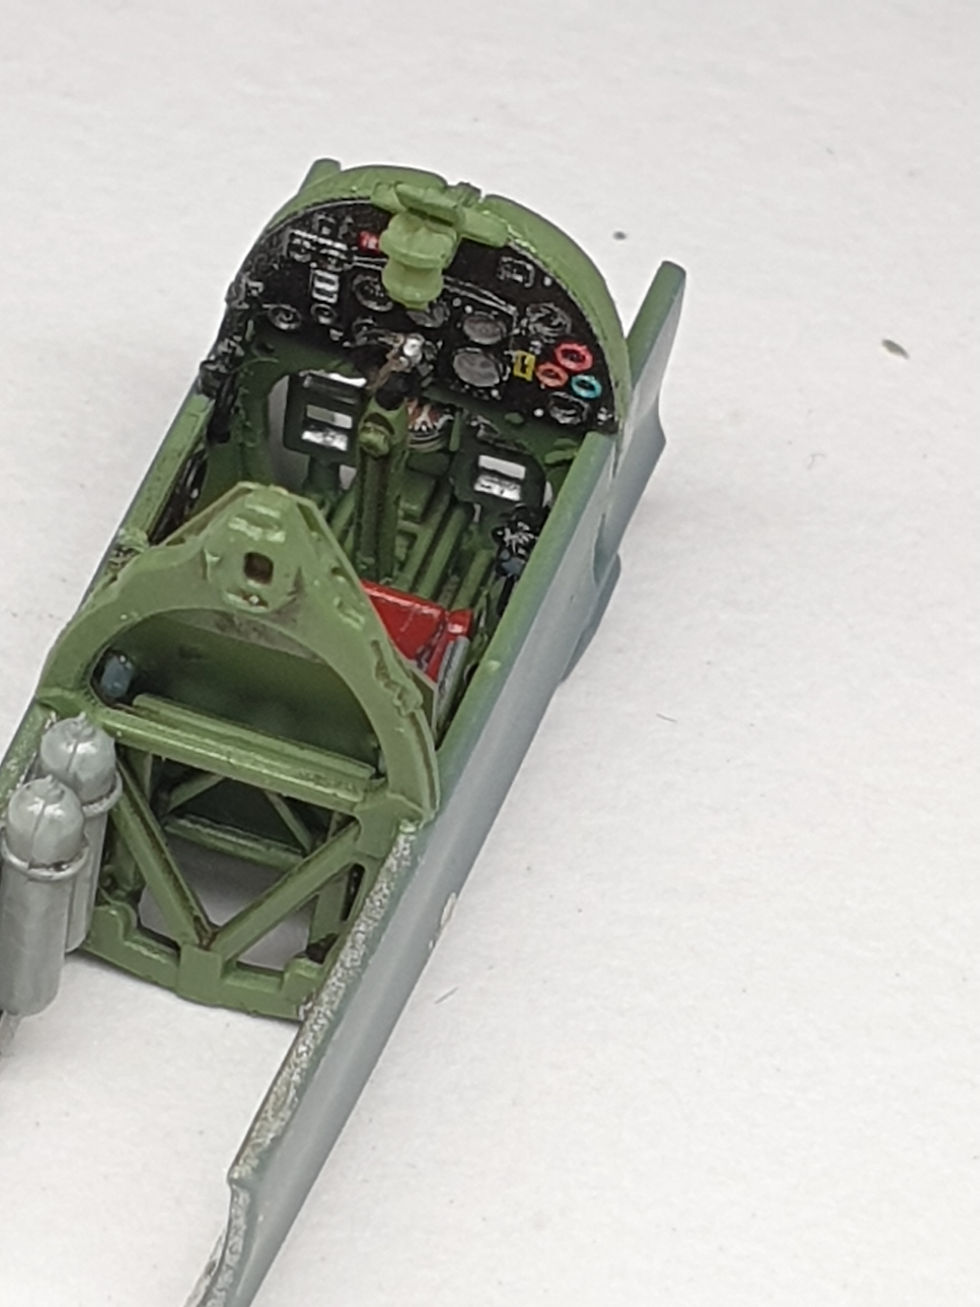
The cockpit was painted using the Tamyia XF-71 cockpit green and Tamyia XF1 matt black. For the seat belts, I have used the ones provided on the PE set as well as the instrument panel. The instrument panel comes in 2 pieces and after gluing them together, have applied some PVA glue to replicate the glass on the instruments.
The 2 sides of the cockpit are presented to us independently from the fuselage, this is an approach different from the usual as most of the manufactures engrave the details on the fuselage sides. I have then proceeded to glue the 2 half's together and it was to no surprise that they fit very well, little or no putty had to be used on it.
I have primed it with Mr surface 1000 and then have made the pre-shading in black.
With all of this done, was time to start the painting of the amazing model. To do so, I have used a new range of paints on the market, the paints from #Xpertcolors. This are laquer based paints and having used a few ranges, I was very pleased with the quality of the paint. They are already airbrush ready and can be used straight on the #airbrush.
I have started with the RAF Azure on the belly and made my way across to the upper body. Using the RAF Middle stone and RAF Dark earth have finished the camo.

Once the paint was dried, it was time for the gloss varnish in preparation to the decals. For the gloss coat I have used the hataka Orange line gloss and for me this works a treat.
Have let it dry for a couple of days and on to the decals. To help setting them down, have resourced to the well known Microsol and Microset.
Once happy with the decals, have applied another coat of gloss to protect the declas and started a light weathering with a was of dark panel liner.
Some chips were added using water colour pencils .
Conclusion
This is a very pleasant kit to assemble with little or no extra work needed to get a good result. For a kit that is just shy of £13.00 it was a great surprise for me the quality of it.
Here is the final result


Hope you all like it and if you think that I can do things in a different way to benefit of all of you, please do let me know.
Many thanks
Plastic Alchemist.


Comments